Process HL7 in the Cloud via Docker containers on Azure
Our HL7 Soup Docker container makes it fast and easy to deploy a server with Azure so that you can have HL7 Soup Editor and Integration Host working fluidly in no time! Here we run through the steps to get an Azure Container Instance up and running using our HL7 Soup Docker Hub Repo as the image source. It's simple and only takes around five minutes to get going.
Should you require additional support in setting up an Azure Container Instance of our server, don' t hesitate to contact us at info@hl7soup.com
Create your Container Instance
1. Start by creating a new Azure Container App in the "Containers" section of the "Create a resource" page in the Azure Portal.
2. Choose your resource group, give your app a name and select "Container image" for the Deployment source.
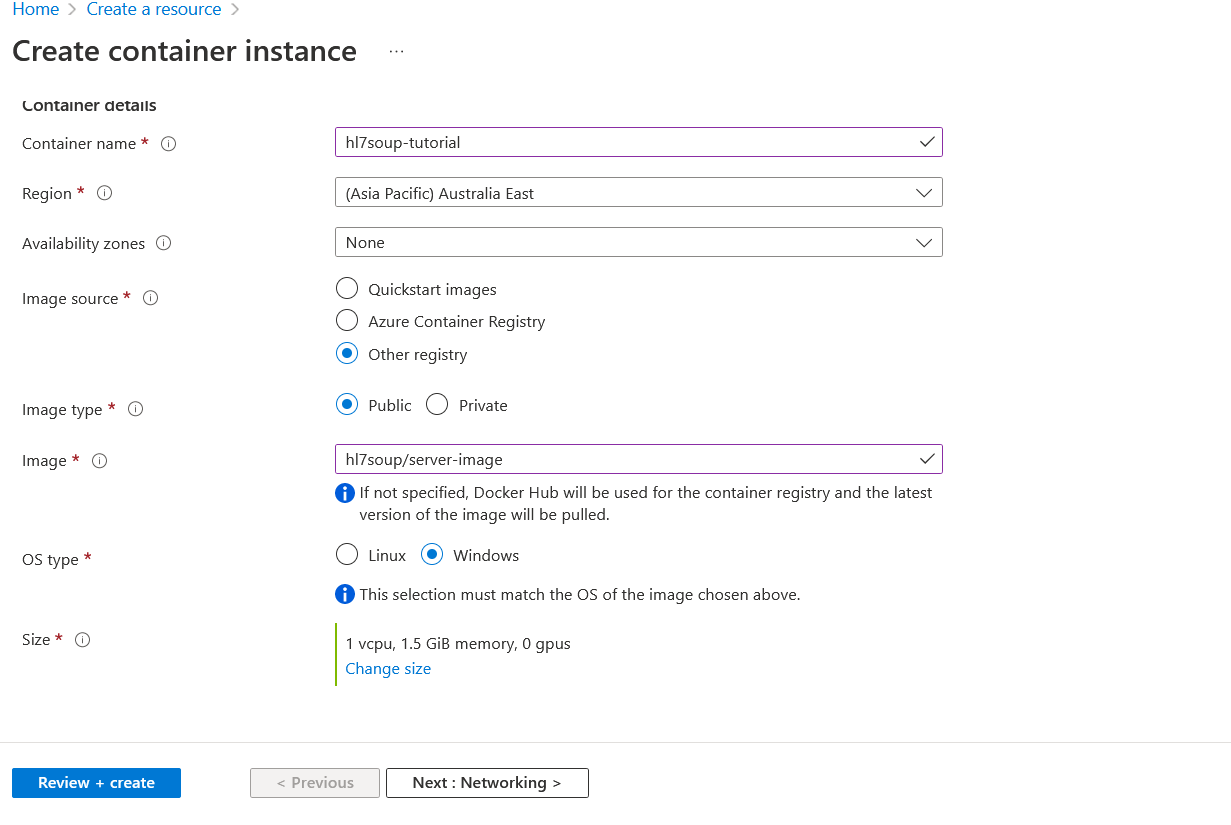
3. Continue to the "Container" page and give your container a name. For the image source select "Docker Hub or other registries" and enter "hl7soup/server-image:3.7" for the "Image and tag" This will pull the server image from our DockerHub repository.

Don't click review and create yet! We need to go to the networking tab and expose some ports for you to be able to connect your HL7 Soup Integration Host client to the server.
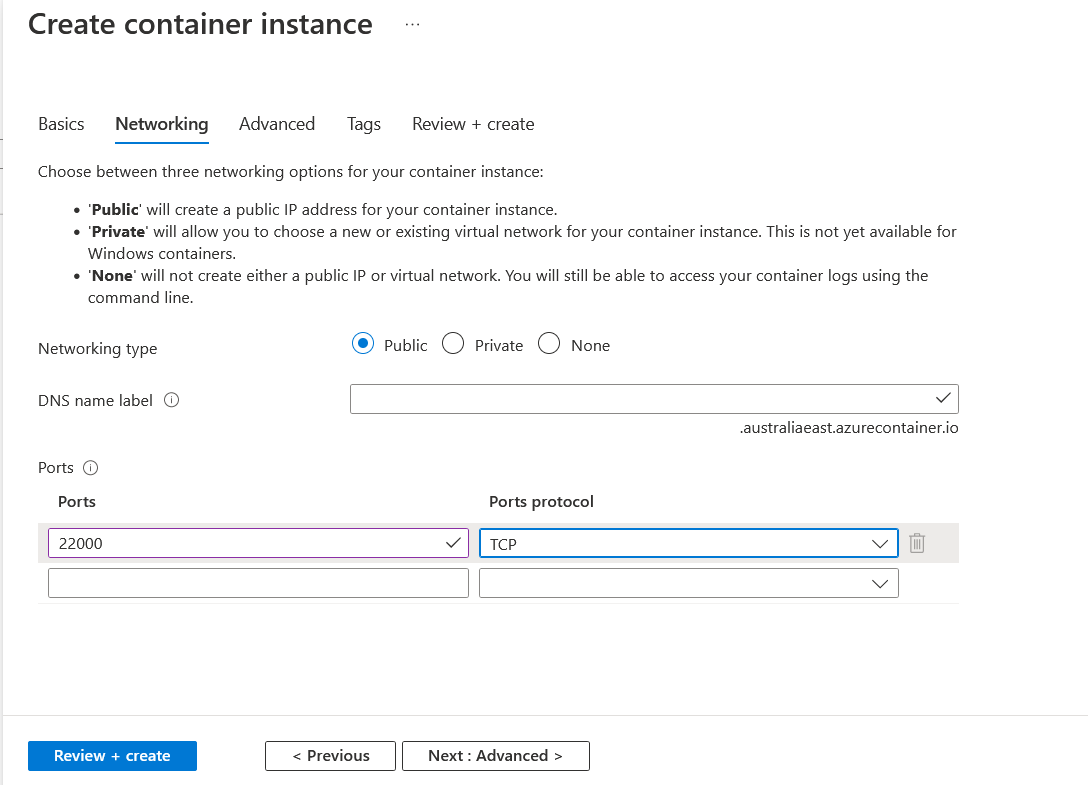
5. Make sure the networking type is public and enter a DNS name label, you can optionally leave this blank and connect via IP address.
6. Make sure to open up port 22000. You'll need this to be able to point your Integration Host client to the container instance.

And you're good to go! Create your container instance, let it deploy and try connecting to it via HL7 Soup Integration Host. You can grab the IP straight off your Azure Container's overview page! Just make sure to put an http:// before and a :22000 after it when you enter it into Integration Host.


Download HL7 Soup and Integration Host from our downloads page.