Process HL7 in the Cloud on AWS
Processing HL7 and FHIR in the cloud is easier than ever with Integration Host. Outlined below are the steps to take in order to get an EC2 Instance of Integration Host up and running using AWS Elastic Beanstalk.
1. Download the Integration Host AWS Package
2. Open the AWS Management Console and navigate to the Elastic Beanstalk.
3. Click 'Create a new environment'.
4. Select 'Web Server Environment'.
5. Give your application and environment a name.
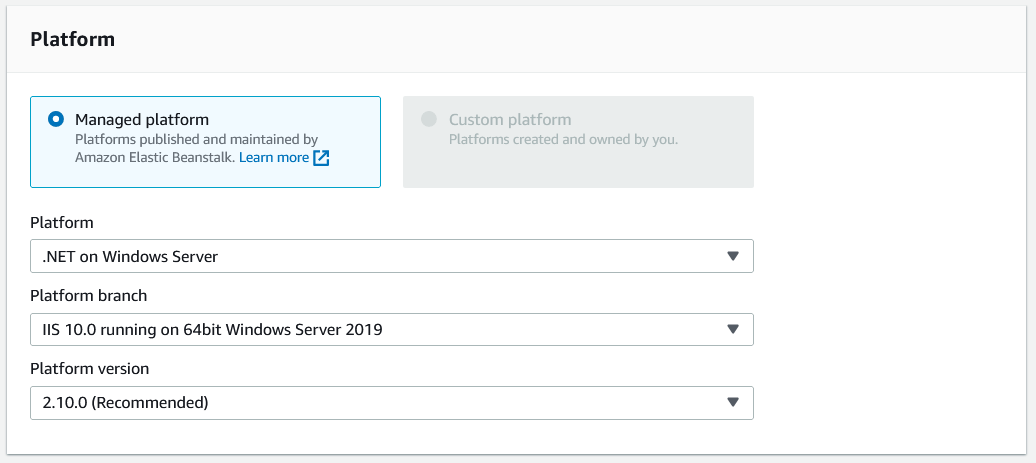
6. For the platform settings choose 'Managed Platform', from the dropdowns choose .NET on Windows Server, IIS 10.0 running on 64bit Windows Server 2019, 2.10.0.
 7. Change Application Code to 'Upload your code' and upload the zip file provided at the top of this guide.
8. Click the 'Create environment' button and give it some time to launch.
9. You should now have a working version of Integration Host server in the cloud! Navigate to the environment's configuration as there are some default settings you might like to change.
Please check out our follow-up guide on securing your cloud deployment with SSL.
Download HL7 Soup and Integration Host from our downloads page.
Return to Tutorials Directory
In this tutorial I’ll cover the steps to take in order to get an EC2 instance of HL7 Soup’s Integration Host up and running on AWS Elastic Beanstalk.
Open your AWS management console, search for and navigate to the Elastic Beanstalk
Click to create a new environment and select the web server environment option
Give your application and environment an appropriate name before scrolling down to the platform settings.
Choose a managed platform and select .NET on windows server for the platform, you can leave the branch and version as the default.
Scroll down a little further and select the upload your code option, upload the Integration Host source package.
Click the create environment button and give it some time to spin up the required resources. Now would be a good time to grab the Integration Host free trial off our website in order to test out your deployment.
Grab the 30-day free trial, and license Integration Host on your computer.
Looking back to AWS, our environment is up and running, so back to the Integration Host client, I’ll show you how to connect.
It’s as easy as opening the settings by clicking the HL7 Soup icon in the top left, clicking on the Server tab and entering the URL found in your environment in the AWS management console.
Let’s quickly create an HTTP endpoint that accepts HL7 data so that we can test out our AWS deployment! Click the ‘new’ button in the top left, select http receiver as the activity type and we can paste an hl7 message template into the inbound message field by right clicking. Let’s copy out the URL and then we can save and close. To test this workflow, I’m just going to use the HL7 Soup editor to simulate an external system.
Here we’ve got a bunch of example messages ready to send so let’s just configure the sender. I’ll change the activity type to an HTTP Sender and paste in the URL. Test the connection by clicking the button and you can see we receive a success! I’ll save and close this now and let’s send through a test message and we can see we got a response back. If we bring up Integration Host, it shows the message has come through and if I refresh the logs, you’ll see that the message has come through correctly.
Great, we’ve successfully got a system that can send and receive in AWS. We haven’t secured it yet. So next, follow the steps to add SSL to your AWS app. Unlike with the Azure app, you’ll need your own domain account.