Send HL7 & FHIR into Azure Blob Storage
This tutorial will cover receiving an HL7 message over HTTP with Integration Host and sending it to Azure Blob Storage
1. Download and extract the Azure Storage dlls here.
2. Copy them into the Custom Libraries directory of your Integration Host Server installation (Usually found at C:\Program Files (x86)\Popokey\Integration Host Server\Custom Libraries) AND your Integration Host Workflow Designer installation
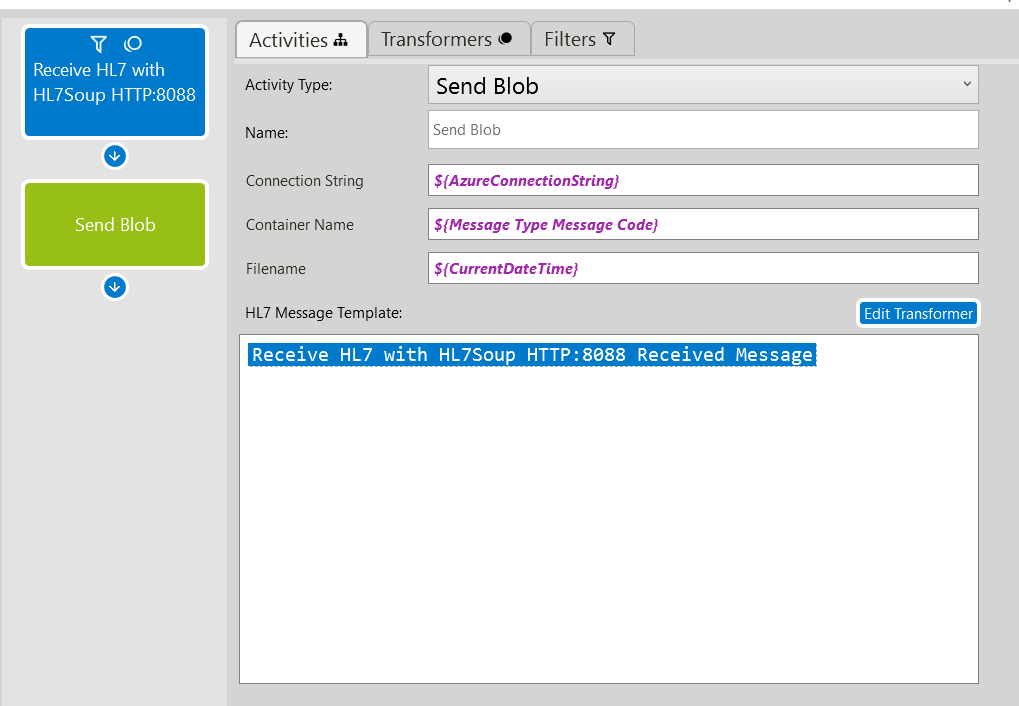
3. Open up the client and create a new workflow. Select HTTP receiver, use an open port and right click to paste a sample message in the message template window.
4. Now add a new activity to your workflow by clicking the arrow underneath your HTTP receiver on the left side of the workflow designer.
5. Select 'Send Blob' for the activity type and fill out the Connection String, Container Name and Filename. You can and should bind these to variables and we'll look at adding the connection string to the global variables later on.
6. Right click in the HL7 Message Template, hover over Insert Activity Message and choose the HTTP receiver created in step 3.
7. Save and close the workflow designer.
Adding your connection string to the Integration Host Global Variables
If you'd like to instead store your connection string inside of Azure Vault & Key Storage, follow the steps outlined here.
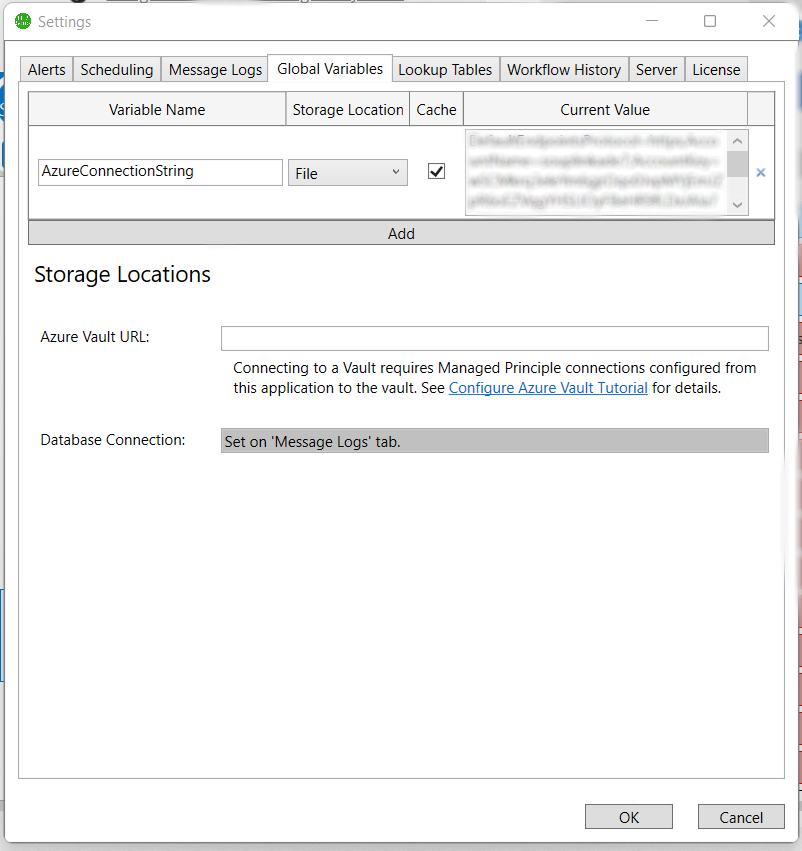
1. Click the HL7 Soup icon in the top left corner of the Integration Host Client
2. Click the 'Global Variables' tab.
3. Click Add, give it a name and paste the value into the Curren Value section.
4. Click OK! You can now use this connection string variable throughout your workflows by right clicking and selecting Insert Variable -> YourVariableName
Download HL7 Soup and Integration Host from our downloads page.